Old Fashioned Apple Pudding

This recipe comes from The Blue Ribbon Cookbook - a $0.25 cookbook my mum’s mum gave her when she got married. That cookbook has many many good old recipes in it that my mum still uses today.
— My mum


“At that point in time, apples were one of the few things you could get during the winter.”

Apple pudding is a simple, 50’s style desert that’s delicious with ice cream or regular cream. It’s a simple dough and with a little bit of butter and a couple of apples, you can make desert for 8!


MAKES

9 servings

TOTAL TIME

Prep: 30min + 30 min bake


INGREDIENTS

  • 1 cup flour

  • 2 tablespoons butter

  • 1 tablespoon baking powder

  • 1/4 teaspoon salt

  • 1 teaspoon sugar

  • 1/2 cup milk

  • 2 apples peeled and thinly sliced

  • sugar & cinnamon

  • 1/2 cup brown sugar

  • 1 tablespoon flour

  • pinch of salt

  • 1 cup boiling water

  • 2 tablespoons butter

  • 2 teaspoons vanilla


METHOD

Pre-heat oven to 375 degrees F

Combine flour, baking powder, salt and sugar.

Cut in butter with a pastry cutter.

Add the milk and make a dough. Roll into a rectangular shape. Spread a bit of additional butter all over the dough.

Place apples on top of dough in a single layer, sprinkle with sugar and cinnamon. Roll up like cinnamon bun

Slice into 9 sections and put into a greased square cake pan.

Create the caramel sauce.

Combine brown sugar, flour and salt in small sauce pan. Pour 1 cup boiling water over the sugar mixture. Stir until thickened.

Add 2 TBSP butter and stir over low hear until it melts.

Remove from heat add 2Tsp vanilla

Pour sauce over apple roll-ups in cake pan. 

Place in the oven for 30 minutes at 375 degrees until bubbling and lightly golden.

Pour cereal cream on top or serve with ice cream and enjoy.


No-knead one pot bread

Anybody can make it! I didn’t know how to make bread. And then it comes out...and it’s like a small miracle every time!
— christine


My Mother never made bread,  I grew up in the 50's in a family of eight when convenience in the kitchen was the modern ideal. But now I've been making this style bread for years.

This is Jim Lahey's no-knead, one pot bread. According to Jim, one of New York City's premier bread bakers, there's a way to streamline the bread-making process so that even a 4-year-old can do it – eliminate the kneading. Lahey's no-knead bread, which he developed at his Sullivan Street Bakery, is a no-frills, crusty European-style loaf that you can't find in a grocery store.


MAKES

16 servings

TOTAL TIME

Prep: 15 hours+ Bake: 45min - 1hr


INGREDIENTS

  • 3 cups (430g) flour

  • 1 1/2 cups (345g or 12oz) water

  • 1/4 tsp (1g) yeast

  • 1 1/4 tsp (8g) salt

  • Olive oil (for coating)

  • Extra flour, wheat bran, or cornmeal (for dusting)

EQUIPMENT

  • 2 medium-size mixing bowls

  • 6- to 8-quart baking pot or Dutch oven with lid (enamel, cast iron, glass, or ceramic)

  • Wooden spoon or spatula (optional)

  • Plastic wrap

  • Olive oil (for coating)

  • 2 or 3 cotton tea towels


METHOD

  1. Mix all the dry ingredients in a medium bowl. Add water and incorporate by hand or with a wooden spoon or spatula for 30 seconds to 1 minute.

  2. Lightly coat the inside of a second medium bowl with olive oil and place the dough in the bowl. Cover the bowl with plastic wrap and let the dough rest 12 hours at room temperature (about 65–72°F).

  3. Remove the dough from the bowl and fold toward the center once or twice. Let the dough rest 15 minutes in the bowl or on the work surface.

  4. Shape the dough into a ball. Generously coat a cotton towel with flour, wheat bran, or cornmeal. Place the dough seam side down on the towel and dust with flour. Cover the dough with a cotton towel, and let rise 1–2 hours at room temperature, until more than doubled in size.

  5. Preheat oven to 450–500°F.

  6. Place the pot in the oven at least 30 minutes prior to baking to preheat. Once the dough has more than doubled in volume, remove the pot from the oven and place the dough in the pot seam side up.

  7. Cover with the lid and bake 30 minutes. Then remove the lid and bake 15–30 minutes uncovered, until the loaf is nicely browned. Remove and let cool before slicing.


Ma'amoul Eid

The whole house will smell of ma’amoul...even my mum smells like ma’amoul.
— suad


"The reason we make this sweet dessert during EID is because your body is craving sugar throughout Ramadan. Most of us when we break our fast, the first day of Eid, we have ma’amoul." 


MAKES

Lots!

TOTAL TIME

Prep: 15 hours+ Bake: 8-10min


INGREDIENTS

For the dough

  • 1kg semolina (1/2 fine, 1/2 rough)

  • 1/2 cup sugar

  • 1/4 cup milk powder

  • 1 tablespoon mahlab powder

  • 400g butter, room temperature

  • 1 or 2 tablespoons ghee

  • 1 teaspoon yeast in 1/4 cup of warm water and 1 tablespoon of sugar

  • 1 teaspoon baking powder

  • 1 can Nestle cream (or any other brand of cream)

  • 1 tablespoon orange blossom water

  • 1/4 cup flour

For the date filling

  • 1 kg dates (khalass kind, the softest and most expensive, usually)

  • 2 tablespoons butter, room temperature

  • 1 teaspoon cinnamon

  • 1 heaping teaspoon mahlab powder

For the walnut filling

  • 2 cups walnuts

  • 1/2 cup caster sugar

  • 1 teaspoon mahlab powder

  • 1 teaspoon cinnamon

  • 1 teaspoon rose water

  • 1 teaspoon orange blossom water

  • 1 tablespoon sugar syrup

  • 1 teaspoon butter, room temperature

For the pistachio filling

  • 2 cups pistachio

  • 1/2 cup caster sugar

  • 1 teaspoon mahlab powder

  • 1 teaspoon rose water

  • 1 teaspoon orange blossom water

  • 1 tablespoon sugar syrup

  • 1 teaspoon butter, room temperature


METHOD

1.     In a large round baking pan, mix the 2 kinds of semolina using your hands with the sugar, milk powder and mahlab.

2.     Add the butter and one tablespoon of ghee, then begin to gently mix by rubbing the mixture between your hands until all is combined. Keep rubbing it between your fingers, until the mixture turns into coarse meal. If your hands turn glossy and the mixture is soft and wet, then you will not need to add another tablespoon of ghee. If it’s dry, then add one more.

3.    When all is combined, cover tightly with foil and allow it to rest 8 hours or overnight, so the mixture really absorbs the butter.

4.    When uncovering, rub the mixture between your hands again to check for dryness.

5.     Then in a cup add warm water over the yeast and sugar and mix to combine, then allow it 5 minutes to bloom.

6.    Once it blooms, pour it over the dough mixture, and add 1 teaspoon of baking powder and the can of cream and orange blossom water.

7.     Begin to bring the dough together with your hands, rubbing it gently between your fingers, until it starts to absorb all the ingredients and form itself into a dough.

8.     Once it starts to come together, incorporate the flour into it, kneading gently until it begins to take form.

9.    Cover with foil, and leave it for 20-30 minutes to rest.

10.  In the meantime, prepare a bowl with about a cup of rough semolina to use when you begin to form the dough into shapes.

11.  Once you’ve allowed the dough to rest, you can now begin filling it and shaping it.

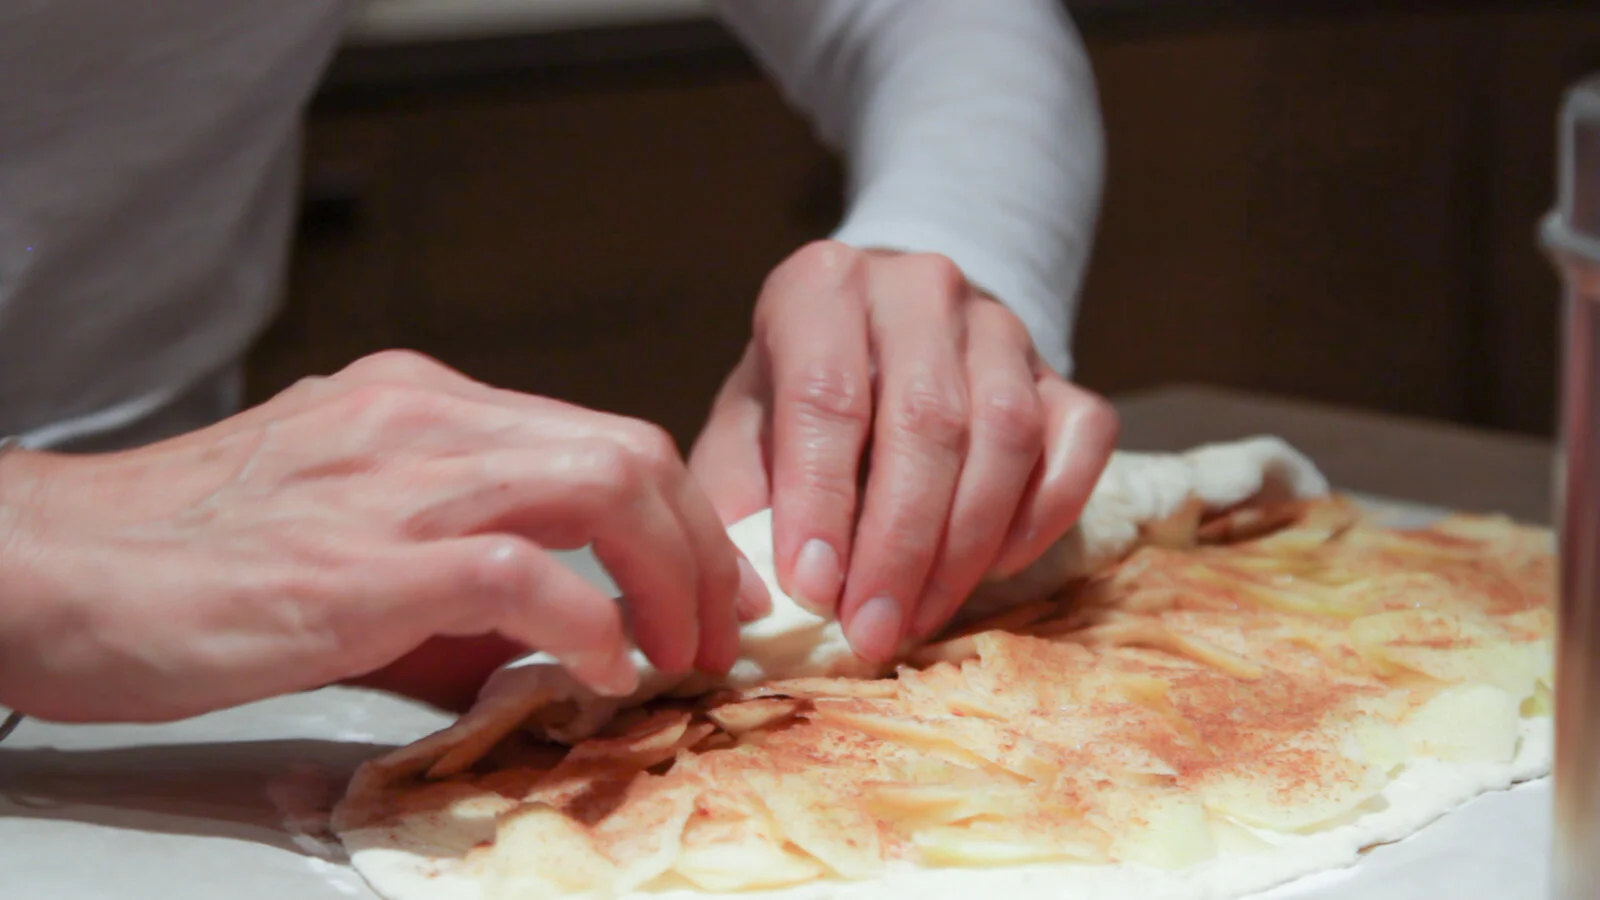
12.  Take a small piece of dough and roll it into a ball, then flatten it on your hand.

13. Place the filling of your choice in the middle of the flattened dough and begin to bring the edges around it, covering it and rolling it back into a ball.

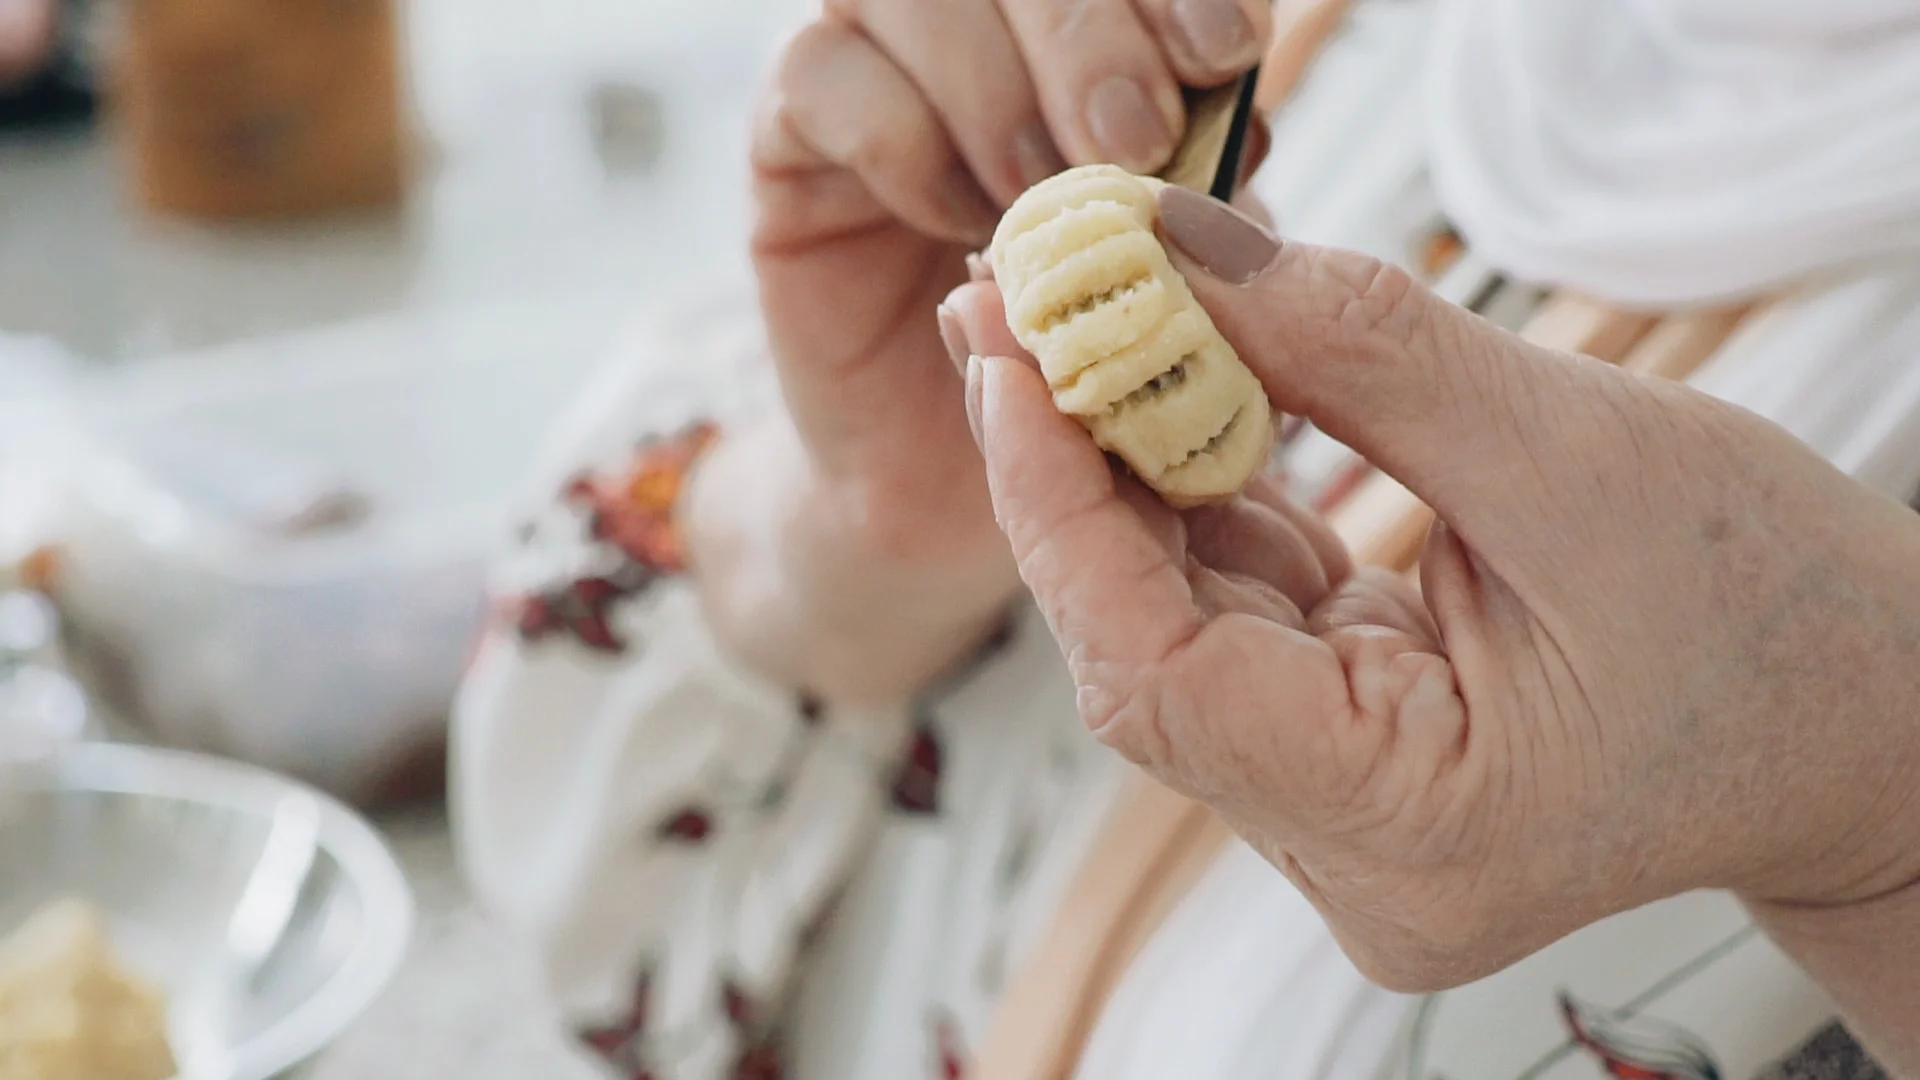
14. Roll the ball into the semolina bowl, then place it into the mould you’re using and tap it to release.

15.  Repeat using different fillings or moulds, until the dough is done.

16. Preheat your oven to 220C, but only the bottom rack.

17.  When your baking tray is ready to go into the oven, turn on the top rack of the oven as well. This way you ensure that the bottom rack has a higher temperature and will cook thoroughly, while the top rack is at a lower temperature giving the cookies a nice color but not scorching them.

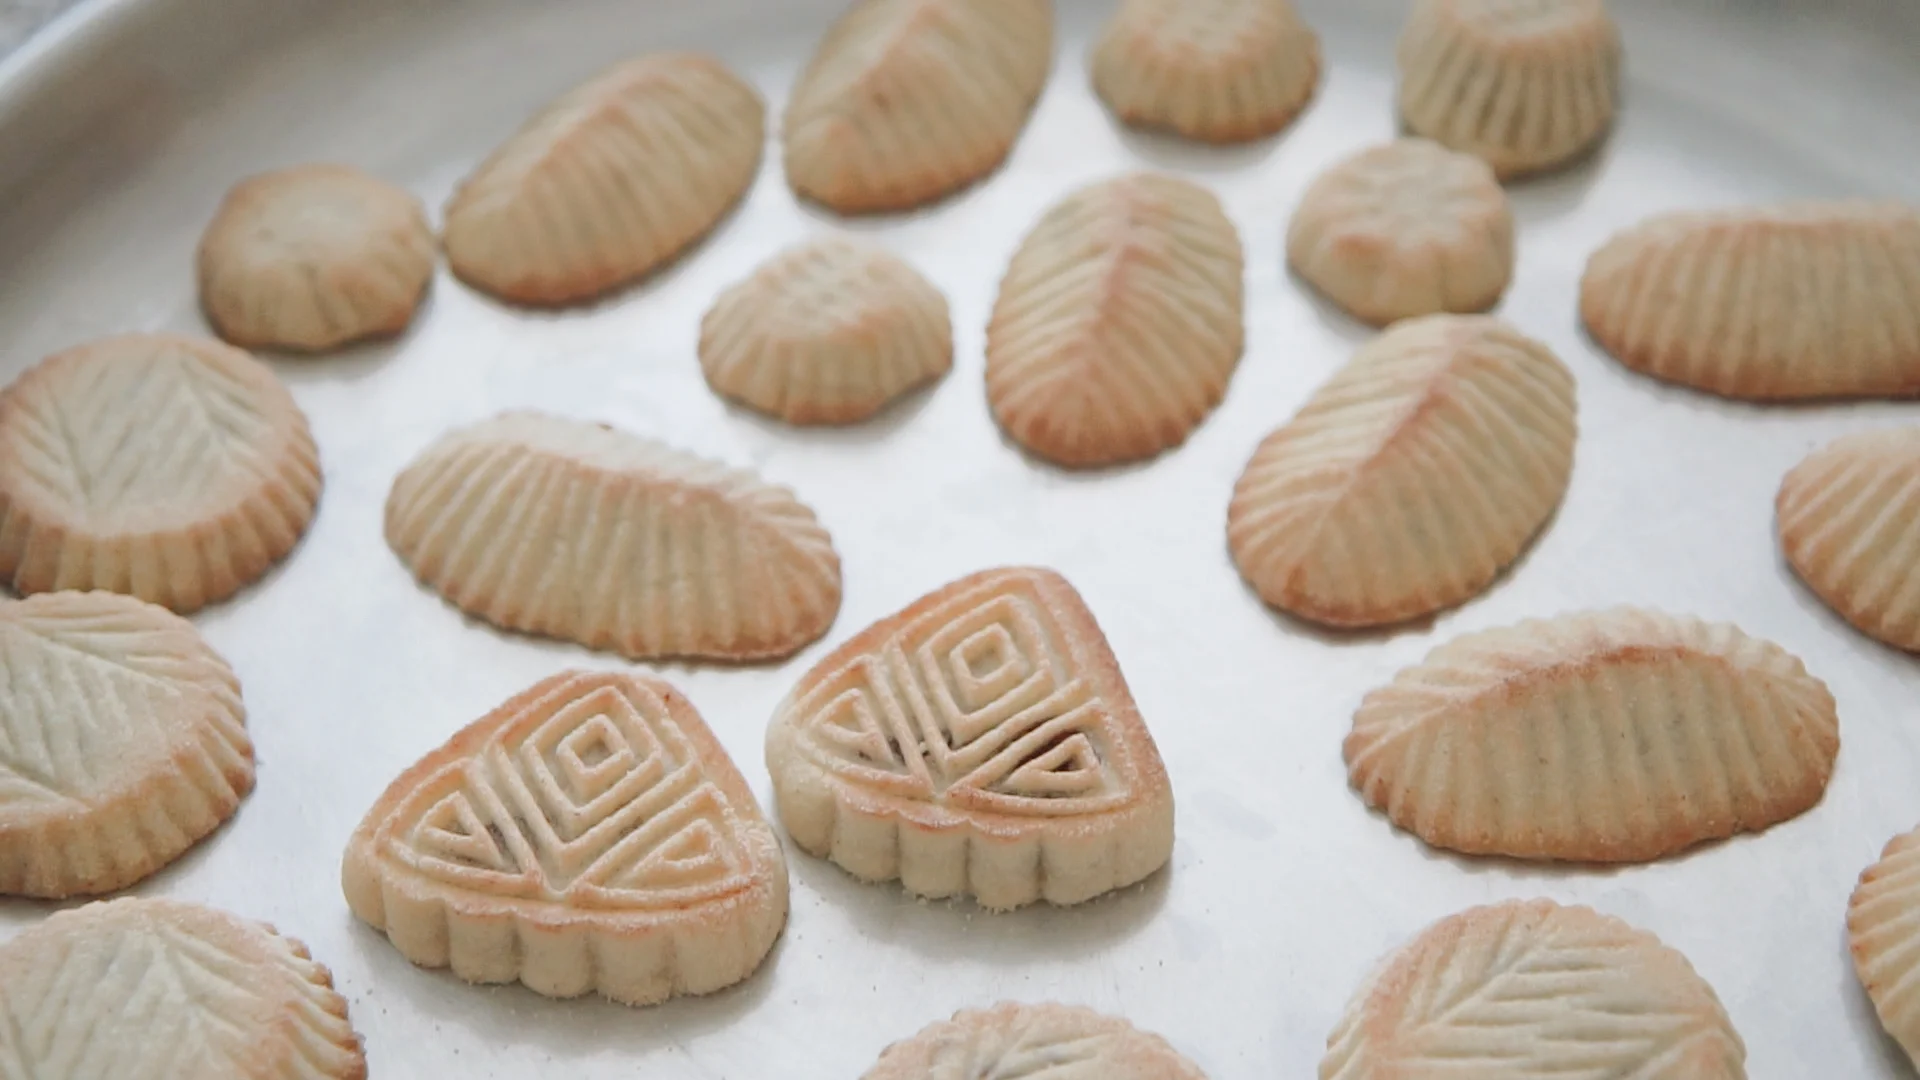
18.  Bake for 8-10 minutes until they begin to slightly change color, turning into a nice golden brown.

19. Make sure you check on them after the 8 minute mark, it only takes a moment for them to turn from a nice golden color to having burnt cookies.


METHOD

1.     For the dates stuffing, remove the seeds from the dates and place them in a large bowl.

2.     Add the butter, cinnamon and mahlab powder and mix, using your hands, to combine.

3.    If it’s not soft or coming together well, add another tablespoon of butter.

4.    Set aside, until ready to use.

5.     For the pistachio stuffing, add the pistachios with the sugar in a food processor and pulse until it is roughly chopped and combined.

6.    Add the mahlab and pulse again.

7.     Put mixture in a bowl and add the rose water, orange blossom water, sugar syrup and butter, and mix to combine until it holds together well.

8.     Refrigerate until it is ready for use.

9.    For the walnuts stuffing, add the walnuts with the sugar in a food processor and pulse until it is roughly chopped and combined.

10.  Add the mahlab and cinnamon and pulse again to combine.

11.  Put mixture in a bowl and add the rose water, orange blossom water, sugar syrup and butter, and mix to combine until it holds together well. Be careful with walnuts, because they absorb water quickly, so you have to work fast.

12.  While you are preparing all the stuffings, always taste as you go and adjust accordingly.

13. Refrigerate until it is ready for use.


armando's puerco asado

I’ve got to tell you that I still see some of the old customers once in a while and they say: “Armando, when are you going to make that pork? I want to come for dinner!”
— Armando


"A friend of mine said to me "why don't you try putting cuban food on the menu?" I said "you think that'll work?" pretty soon we had one page of continental, and a whole page of Cuban food!"


MAKES

6-8 servings

TOTAL TIME

Prep: 45min + Marinate +  3+hours bake time


INGREDIENTS

  • 2.25 - 2.5 kg pork roast (butt end)

  • 1 tbsp dried oregano

  • 1 teaspoon salt

  • juice of 1 large orange

  • juice of 2 limes

  • 3-5 garlic cloves

EQUIPMENT

  • big bowl for marinating

  • sharp knife

  • roasting pan


METHOD

  1. Pierce pork all over with a fork or sharp knife.

  2. Combine oregano and salt; sprinkle all over pork. Place in large plastic bag.

  3. Combine juices and garlic and add to meat.

  4. Seal bag tightly and turn several times to coat meat with juices. Place in refrigerator over-night, turning bag occasionally.

  5. Preheat oven to 450–500°F.

  6. Place the pork in the oven for 30 min on high heat.

  7. Turn the heat down to 350 for an hour.

  8. Turn down heat to 300 for 1.5-2 hours.

  9. Serve with potatoes or rice and black beans, and a selection of seasonal vegetables.


Ice Kipfel

Back before spatula’s, they were better cooks! They could make something out of nothing.
— Grandma Ellie


"How many times have you done this Grandma?" "Oh Madeline, I'd hate to count."

Ice Kipfel is an old German breakfast treat we've eaten since before I can remember. It's folded and twisted and we captured this so that the family would be able to make them for generations. The original recipe reads "fold and twist" and you'll see we would never have ended up with anything remotely close without the video.


MAKES

3 dozen

TOTAL TIME

Prep: 40min + overnight + fold, twist & bake


INGREDIENTS

  • 1 cup warm milk

  • 2 teaspoons sugar

  • 2 tablespoons yeast

  • 3 eggs

  • 1 cup (container) sour cream

  • 1 cup melted lard

  • 6 cups flour

  • 1 teaspoon baking powder

  • 1/2 teaspoon salt


METHOD

In a small bowl, combine the warm milk, sugar and yeast. Leave it for 8-10 minutes until it begins bubbling.

In a separate large bowl, beat the eggs. Add the sour cream and melted lard. Add the yeast mixture to this.

In a third bowl, combine the flour, baking powder and salt.

Slowly add the dry ingredients to the wet ones, one cup at a time. Mixing with a wooden spoon. This is a good workout! 

Cover the bowl and put it in the fridge overnight.

--

Pre-heat the oven to 350 degrees F.

Cut the dough in half. 

Roll it out fairly thin and sprinkle some sugar in a line down the middle. Fold over in thirds.

Roll this out length wise. Put sugar in the middle third and fold again in three. Put sugar on each third as you fold.

Roll this out again.

Fold in 3 once more. With the sugar on each fold. 

Roll it out a little bit. 

Cut in thin strips and tie into a tiny knot. You should see all of the layers here. 

Dip the knot in a little bit of sugar and place on parchment paper. 

Place in the oven for 20 minutes at 350 degrees F. Watch the bottoms as they tend to burn. 

Remove and enjoy a few fresh ones! Grandma Ellie says 5 is the limit!


Old-Fashioned Potato Noodles

Back then the women were creative in the kitchen because they had to be - just to feed their families! We cannot even comprehend what they had to do, we think of it though. We must always remember how lucky we are.
— Helen


I think it was probably a Russian or German thing. It seems like all those people that came over and there was a lot of them, they all did noodle stuff, so we did too.  


MAKES

4-6 servings

TOTAL TIME

Prep: 30 min.  Cook Time: 20 min. 


INGREDIENTS

  • 6 cups flour
  • 6 teaspoons baking powder
  • 1 teaspoon salt
  • 2-1/2 cups water
  • 2 medium potatoes skinned and cubed
  • 3-4 tablespoons lard
  • 1 cup water
  • 1 medium onion
  • 2 tablespoons butter
  • 1 can dices tomatoes 

METHOD

In a large bowl,  combine the flour, baking powder and salt. Mix in the 2.5 cups of water and combine together with your hands. Adjust the dough if it's too stiff or too sticky by adding a little more water or a little more flour.  Remove dough from bowl and knead well. Split into 4 parts.

Heat up a dutch oven - a pot with the bottom covered in about a half inch of water plus 2 heaping tablespoons of lard. Keep the heat at medium.

Begin pulling small pieces of dough off (2 inches) and rolling them between your hands. Cover the bottom of the hot pot with dough noodles followed by a layer of potatoes. Work quickly, you want to get the lid on as soon as possible. Continue alternating between noodles and potatoes until all of the dough is gone. Place the lid on the pot and don't open it. Wait for approx. 20 mins.

While the noodles are cooking, prepare some cooked onions. Dice an onion and cook it with butter in a small sauce pan. Do not over cook them.

When the noodles are done, they will have a slightly fried smell and you'll hear them bubbling away inside the pot. Turn the heat off. Remove the lid and add the onions, breaking up the noodles and the potatoes as you go. Try to scrape the crispy bits off the bottom, these have the most flavour! 

Serve warm with diced canned tomatoes, ketchup or sour cream. 

Do not eat for 1 week once finished :)


Auntie Laura's Christmas Truffles

We just put them out in the snow!
It’s just as good as a freezer if not better.
— laura


The trick is to work quickly,
so they don’t melt.


MAKES

I dunno, a lot.

TOTAL TIME

Prep: 45min + cool + 30min


INGREDIENTS

  • 24 oz sweet milk chocolate

  • 1/2 cup unsalted butter

  • 1 1/2 cup whipping cream

  • 3 tbsp cognac or other liqueur (optional)

  • coating: 12-16 oz dark chocolate

  • topping (white chocolate, coconut, almond dust etc.)


METHOD

  1. Melt milk chocolate with butter over hot (not boiling) water. Melt slowly.

  2. Remove from heat.

  3. Slowly strain 1/4 cup whipping cream into chocolate mixture stirring with a whisk until smooth.

  4. Repeat with remaining whipping cream (mixture may curdle at first but will get smooth as you add and whisk the cream.)

  5. Drizzle liqueur into mixture and whisk until smooth (optional.)

  6. Place in fridge until firm.

  7. Scoop small pieces with a melon baller or a teaspoon.

  8. Shape pieces by hand into round or oval shapes.

  9. Put outside in snow or into freezer until firm.

  10. Melt dark chocolate over steam.

  11. Carefully dip each truffle into melted chocolate.

  12. Top with desired toppings.

  13. Keep in freezer or fridge.


Kavechikinadle - Plum Dumplings

I don’t think anyone else in the world has ever made these, they’re quite unusual.
— Little Ellie


Kavechikinadle is made once a year, at the end of summer when you can buy a crate of plums for cheap!

No need to remove the pit, just put the whole thing in and "roll it up!"


MAKES

12 servings

TOTAL TIME

Prep: it's an afternoon thing...


INGREDIENTS

  • 20 plums
  • 1 cup cold mashed potatoes (using instant is easy!)
  • 4 cups of flour (it might be 6)
  • 1 tablespoon baking powder
  • 2 cups of water
  • 2 eggs
  • 2 cups breadcrumbs browned in butter
  • cottage cheese
  • sugar for sprinkling

METHOD

Combine  mashed potatoes, flour and baking powder. Make a well and add 2 cups of water, add 2 eggs. Roll this dough into a "sausage" shape and cut off pieces big enough to cover 1 plum entirely.

Roll the dough around each plum. No need to remove the pit.

Brown some breadcrumbs in a frying pan with butter.

Drop the plum balls into boiling water. They are cooked when they rise to the top and float. Roll the plum balls in the breadcrumbs and serve warm and crispy. Serve with cottage cheese and sugar for sprinkling.